


Android Studio Custom Lint Tool
Introduction
Android Studio provides a code scanning tool called lint that helps you find and correct problems with the structural quality of your code without actually executing your app or writing test cases. Every issue detected by the tool is reported with a descriptive message and severity level so you can prioritize key improvements. In addition, you can reduce the severity of an issue to ignore issues that are not relevant to the project, or increase the severity to highlight specific issues. Here’s how to implement custom Lint.
Execute Lint command:
- ./gradlew app:xxx (variant under app Module, the most efficient)
- ./gradlew app:lint (app Module)
- ./gradlew lint (whole project)
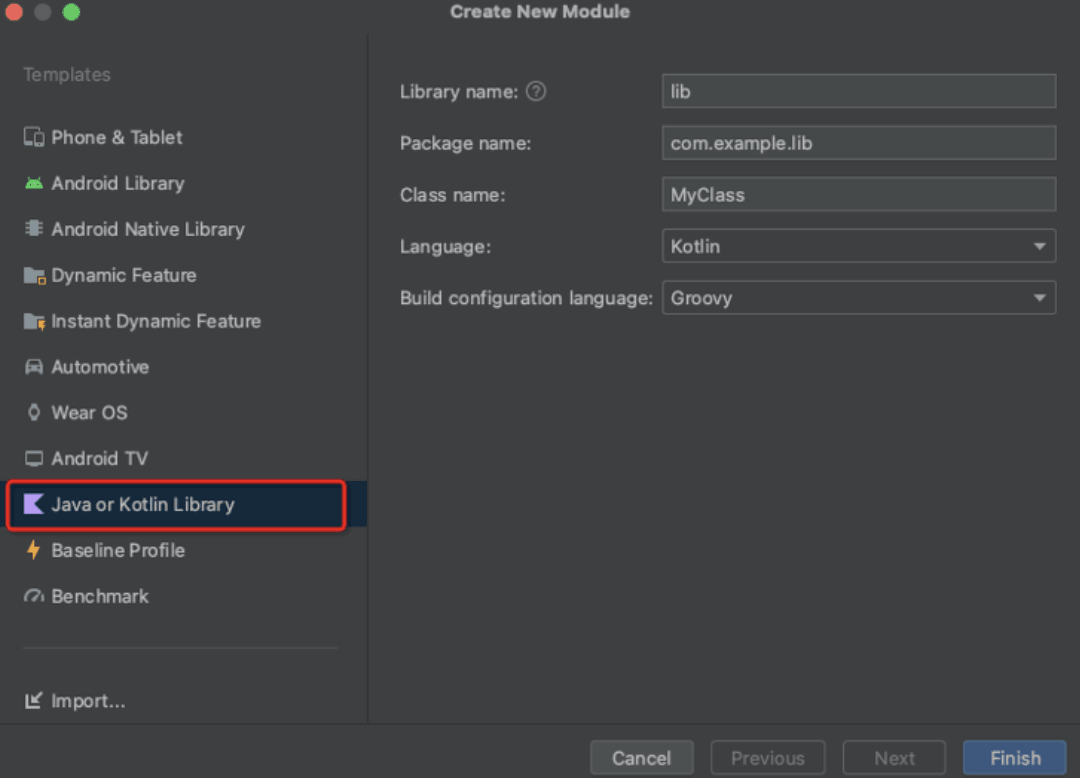
1.Create the module where the custom Lint code is located in the project, select Java or Kotlin Library
2.Add dependencies
1 | dependencies { |
Note: Use compileOnly in dependency mode, otherwise an error may be reported.
3.Write custom detection code, inherit Detector, and implement the required Scanner. Currently supported Scanners are:
- UastScanner: scan Java or kotlin source files
- ClassScanner: scans bytecode or compiled class files
- BinaryResourceScanner: scan binary resource files (res/raw/bitmap, etc.)
- ResourceFolderScanner: scan resource folders
- XmlScanner: scan xml format files
- GradleScanner: Scan Gradle format files
- OtherFileScanner: other types of files
4.Take XmlScanner as an example
LayoutDetector inherits Detector and implements XmlScanner. Traverse the control IDs and add the prefix to the IDs that do not start with the control abbreviation:
1 | @Suppress("UnstableApiUsage") |
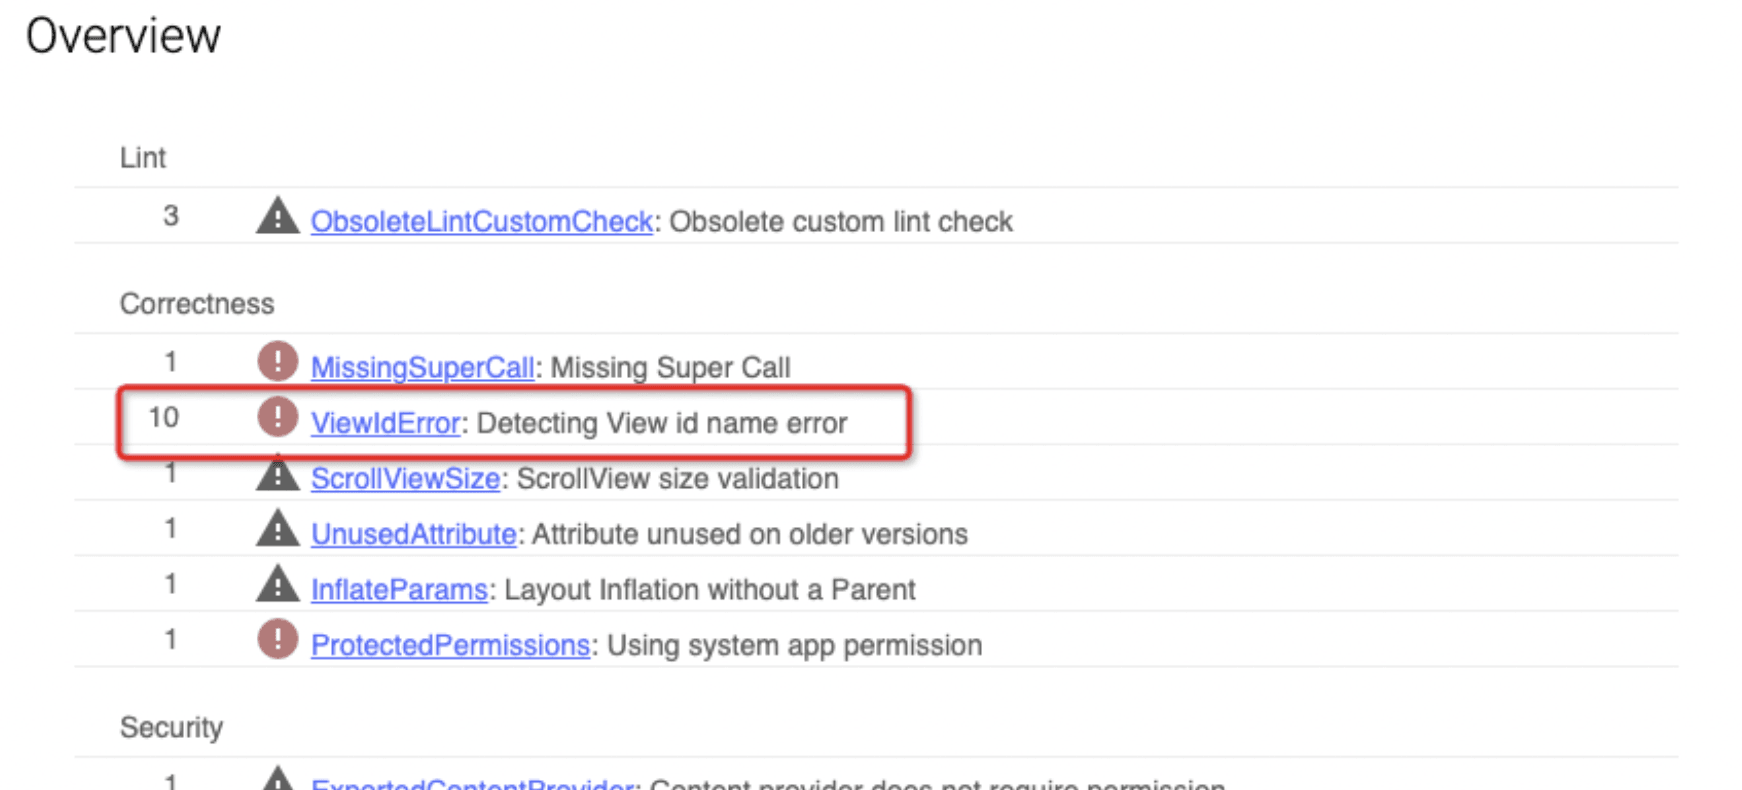
The context.report() method can output the inspection results to a file or log.
The parameters for creating an issue are explained as follows:
- Parameter id is a unique id, briefly indicating the current prompt question.
- Parameter briefDescription briefly describes the current problem
- Parameter explanation explains the current problem and repair suggestions in detail
- Parameter category problem category, there are mainly six categories in Android:
- SECURITY: Security. For example, there is no relevant permissions configured in AndroidManifest.xml, etc.
- USABILITY: Ease of use. Such as duplicate icons, some yellow warnings, etc.
- PERFORMANCE: performance. For example, memory leaks, xml structure redundancy, etc.
- CORRECTNESS: Correctness. For example, calling API with super version, setting incorrect attribute values, etc.
- A11Y: Accessibility. For example, spelling errors, etc.
- I18N: Internationalization. For example, strings are missing translations, etc.
- Parameter priority priority, from 1 to 10, 10 is the most important
- Parameter Severity severity: FATAL (crash), ERROR (error), WARNING (warning), INFORMATIONAL (informational), IGNORE (ignorable)
- Which Detector the parameter Implementation Issue is bound to, and declares the scope of the inspection.
5.Register a custom Detector
Custom registration class CustomIssueRegistry, inherits IssueRegistry
1 | @Suppress("UnstableApiUsage") |
Add registration in the build.gradle file under the new Lint Module
1 | jar { |
Note: Lint-Registry-v2 is used here. Lower versions of Lint use Lint-Registry. Lint-Registry is still used in many documents on the Internet.
6. Use it in the Module that needs to be detected and add it under dependencies.
1 | lintChecks project(path: ':LintTools') |
Execute the command ./gradlew app:xxx and you can see our customized results.
7. Generate aar dependencies for use
7.1 Create a new Android Library LintAAR (name it as you like) and add it to the build.gradle file
1 | dependencies { |
7.2 Add dependencies under the Module you need to use
1 | implementation project(path: ':LintAAR') |
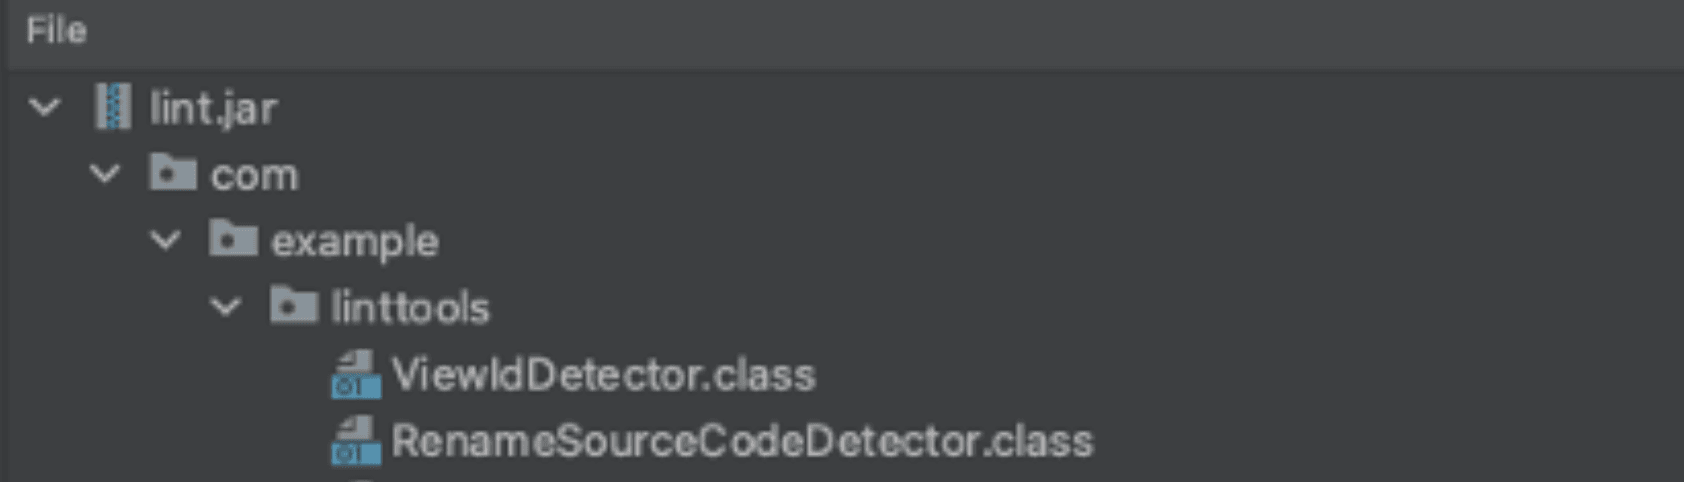
7.3 Execute the assemble of LintAAR, you can see that lint.jar is already included in aar. Not executing assemble will not affect the execution of the Lint command.
You can use it by executing the Lint command